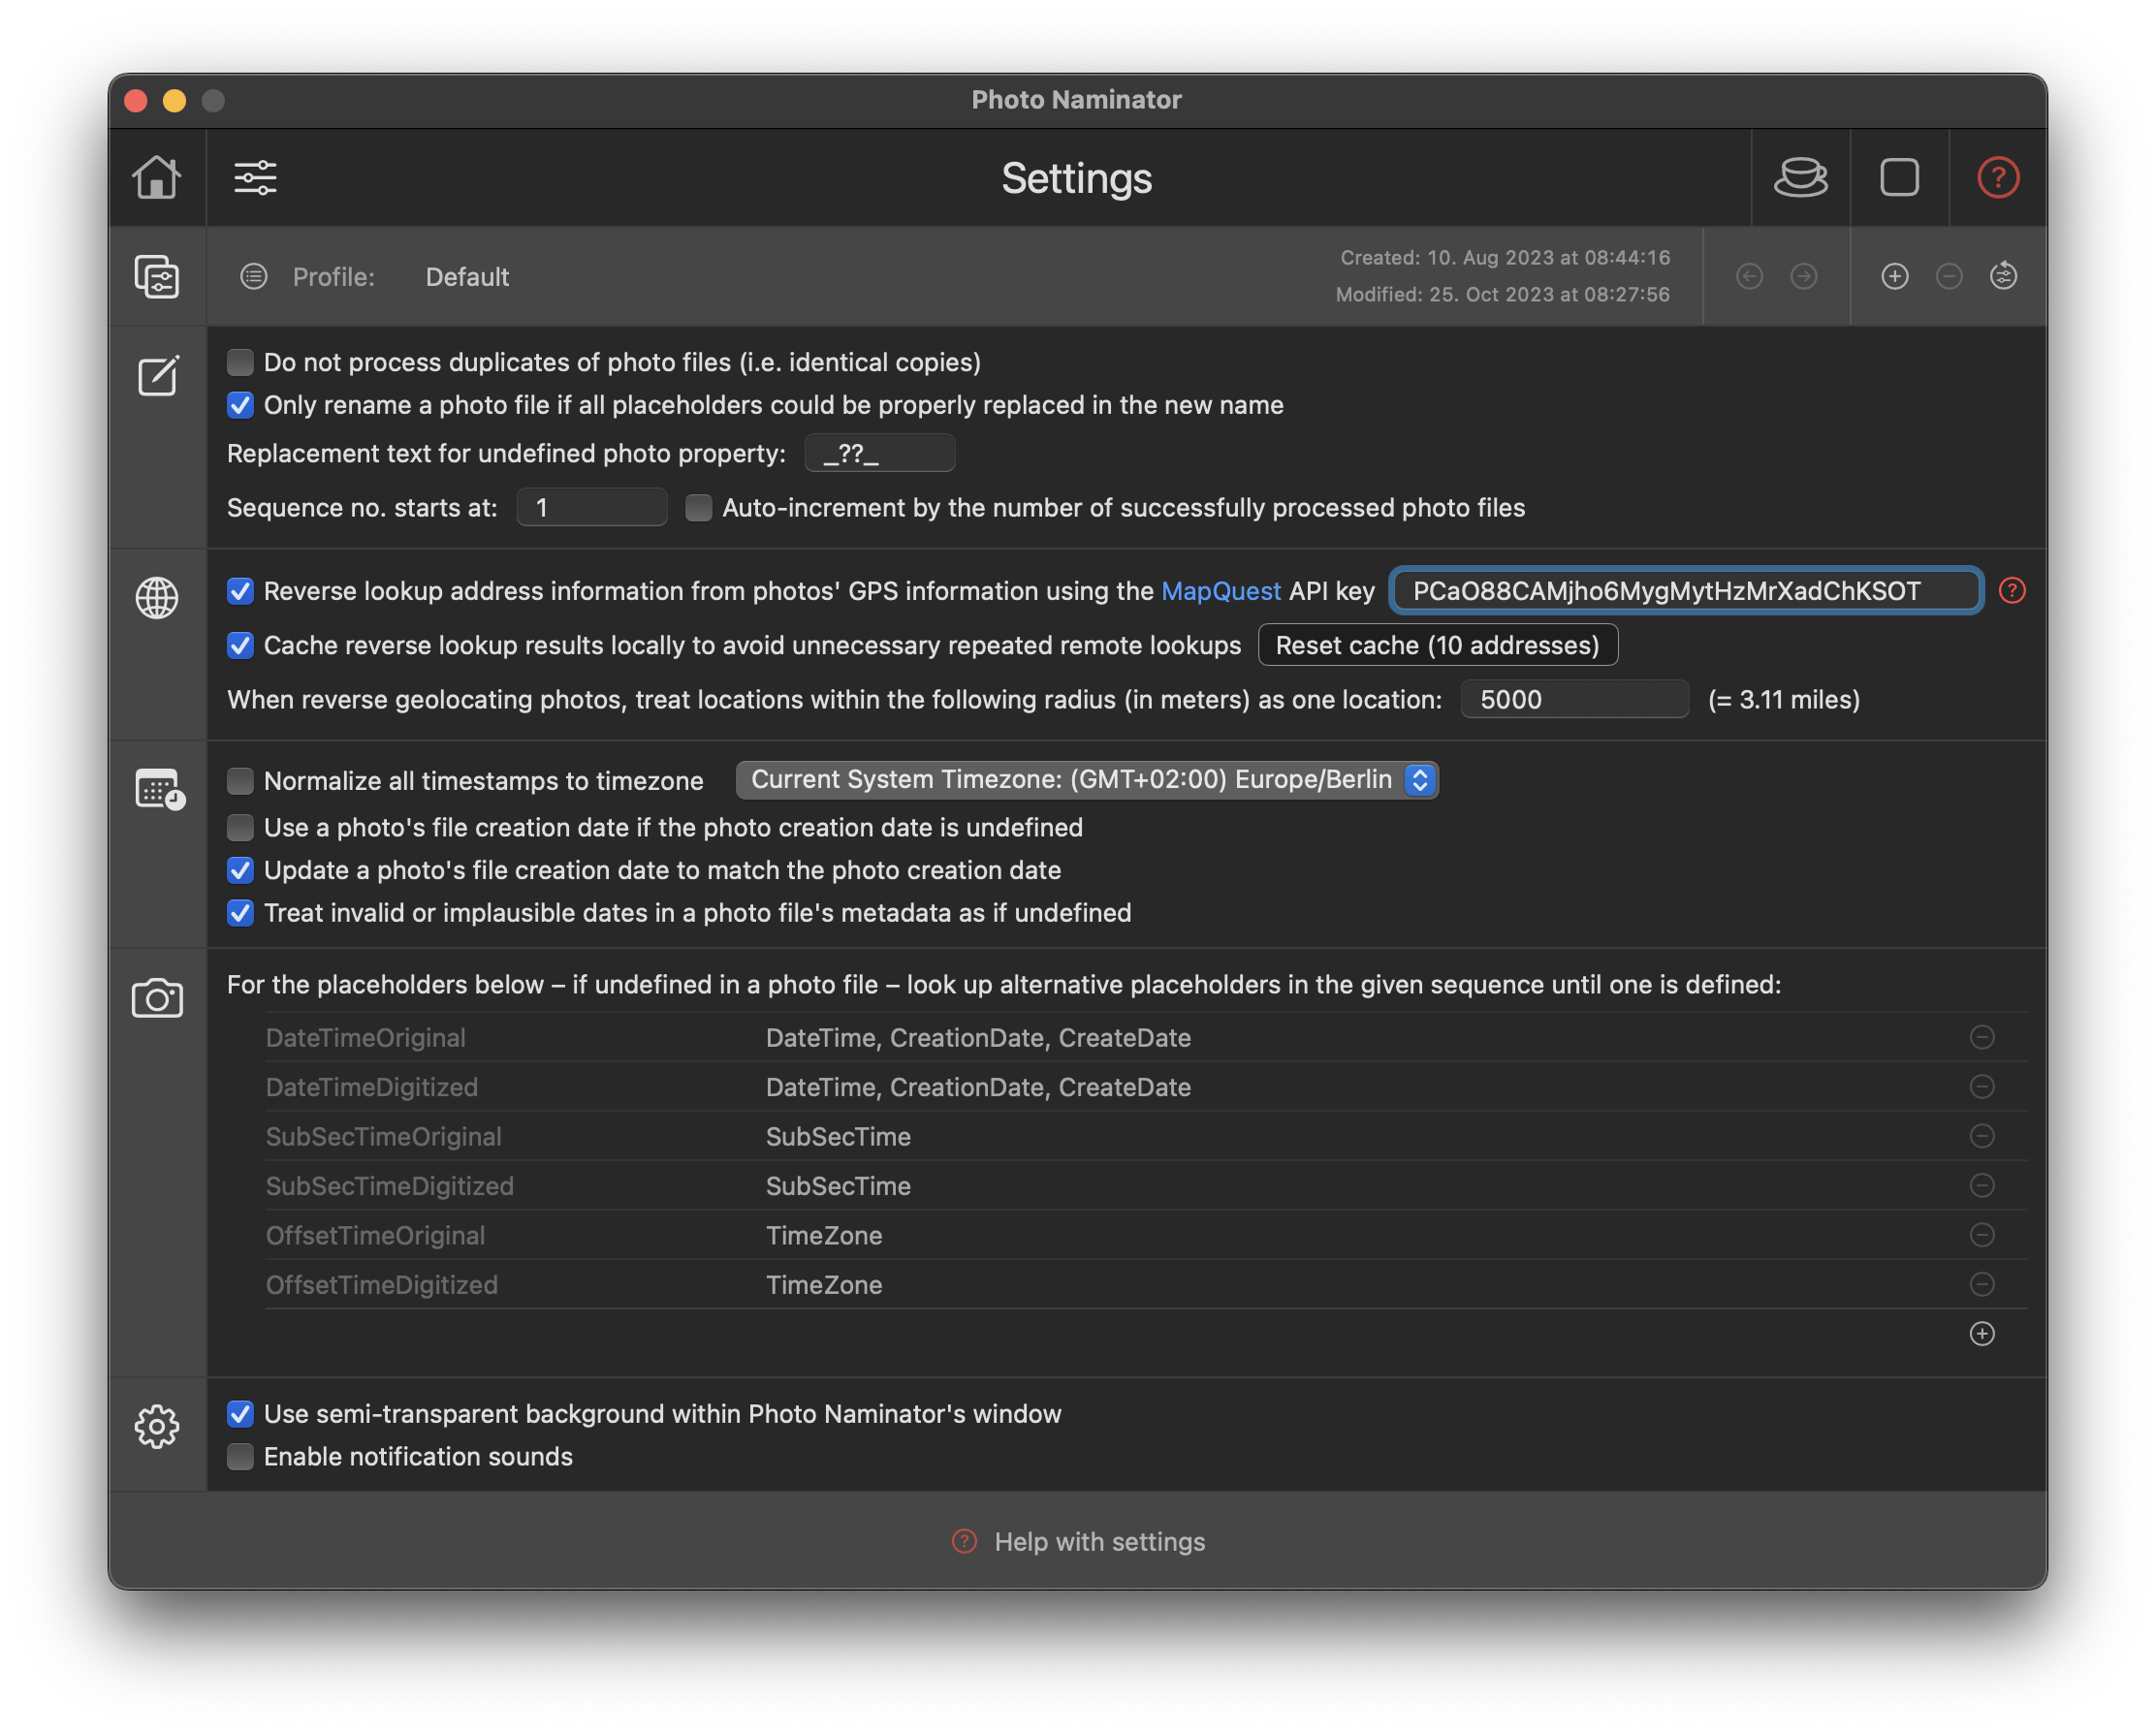
As of v1.81, Photo Naminator supports reverse geolocating, i.e. the lookup of address information based on a photo's GPS location data via the MapQuest geolocation API. This allows you to automatically retrieve address information to places near the location where a photo was taken.
Where a photo was taken is derived from the two metadata properties "GPSLatitude" and "GPSLongitude". The address retrieved for this location consists of street ("GPSStreet"), city ("GPSCity""), state ("GPSState") and country ("GPSCountry") information and will be added to the photo's metadata properties – you can then use them like any other property in a name pattern by referring to the respective metadata property names.
Using this feature will cause Photo Naminator to issue an HTTPS (i.e. secure HTTP) request from your Mac to an Internet service provided by MapQuest reachable at https://developer.mapquest.com. The actual URL of the MapQuest API invoked is https://www.mapquestapi.com/geocoding/v1/batch, and the latitude and longitude information of your photos is passed as query parameters in order to get the corresponding closest address returned. If you do not feel comfortable about MapQuest getting access to this information for all the photos you process and if you have privacy related concerns, then do not use this feature. By default, the feature is disabled and you need to explicitly enable it in the Settings section first.
Privacy policy: Before enabling and using the reverse geolocation lookup feature via MapQuest, please carefully check out the MapQuest website at https://developer.mapquest.com, in particular their privacy policy to ensure that you feel fine with the terms of use: https://system1.com/terms/privacy-policy.
If you feel comfortable about sharing geolocations of your photos with MapQuest – and potentially the location trail associated with your photos and your registration at MapQuest – you need to have a valid MapQuest free-of-charge or paid account or create a new one (which is easy and straightfoward). Once you have a valid account registered, you can quickly create a free-of-charge or paid API key. This API key has a number of so-called transactions, in our case corresponding to individual address lookups, associated. The free-of-charge option provides you with 15.000 (fifteen thousend) transactions per month, which should be more than enough for your photo collection (given that Photo Naminator does some optimizations in the background when configured correctly (as is by default)).
The following sections will guide you through the necessary setup procedure that you have to do once only after installing Photo Naminator. These steps are:
Once you've successfully completed these 4 steps, you can load your photos into Photo Naminator and it will automatically retrieve address information for all those photos that come with GPS location information attached.
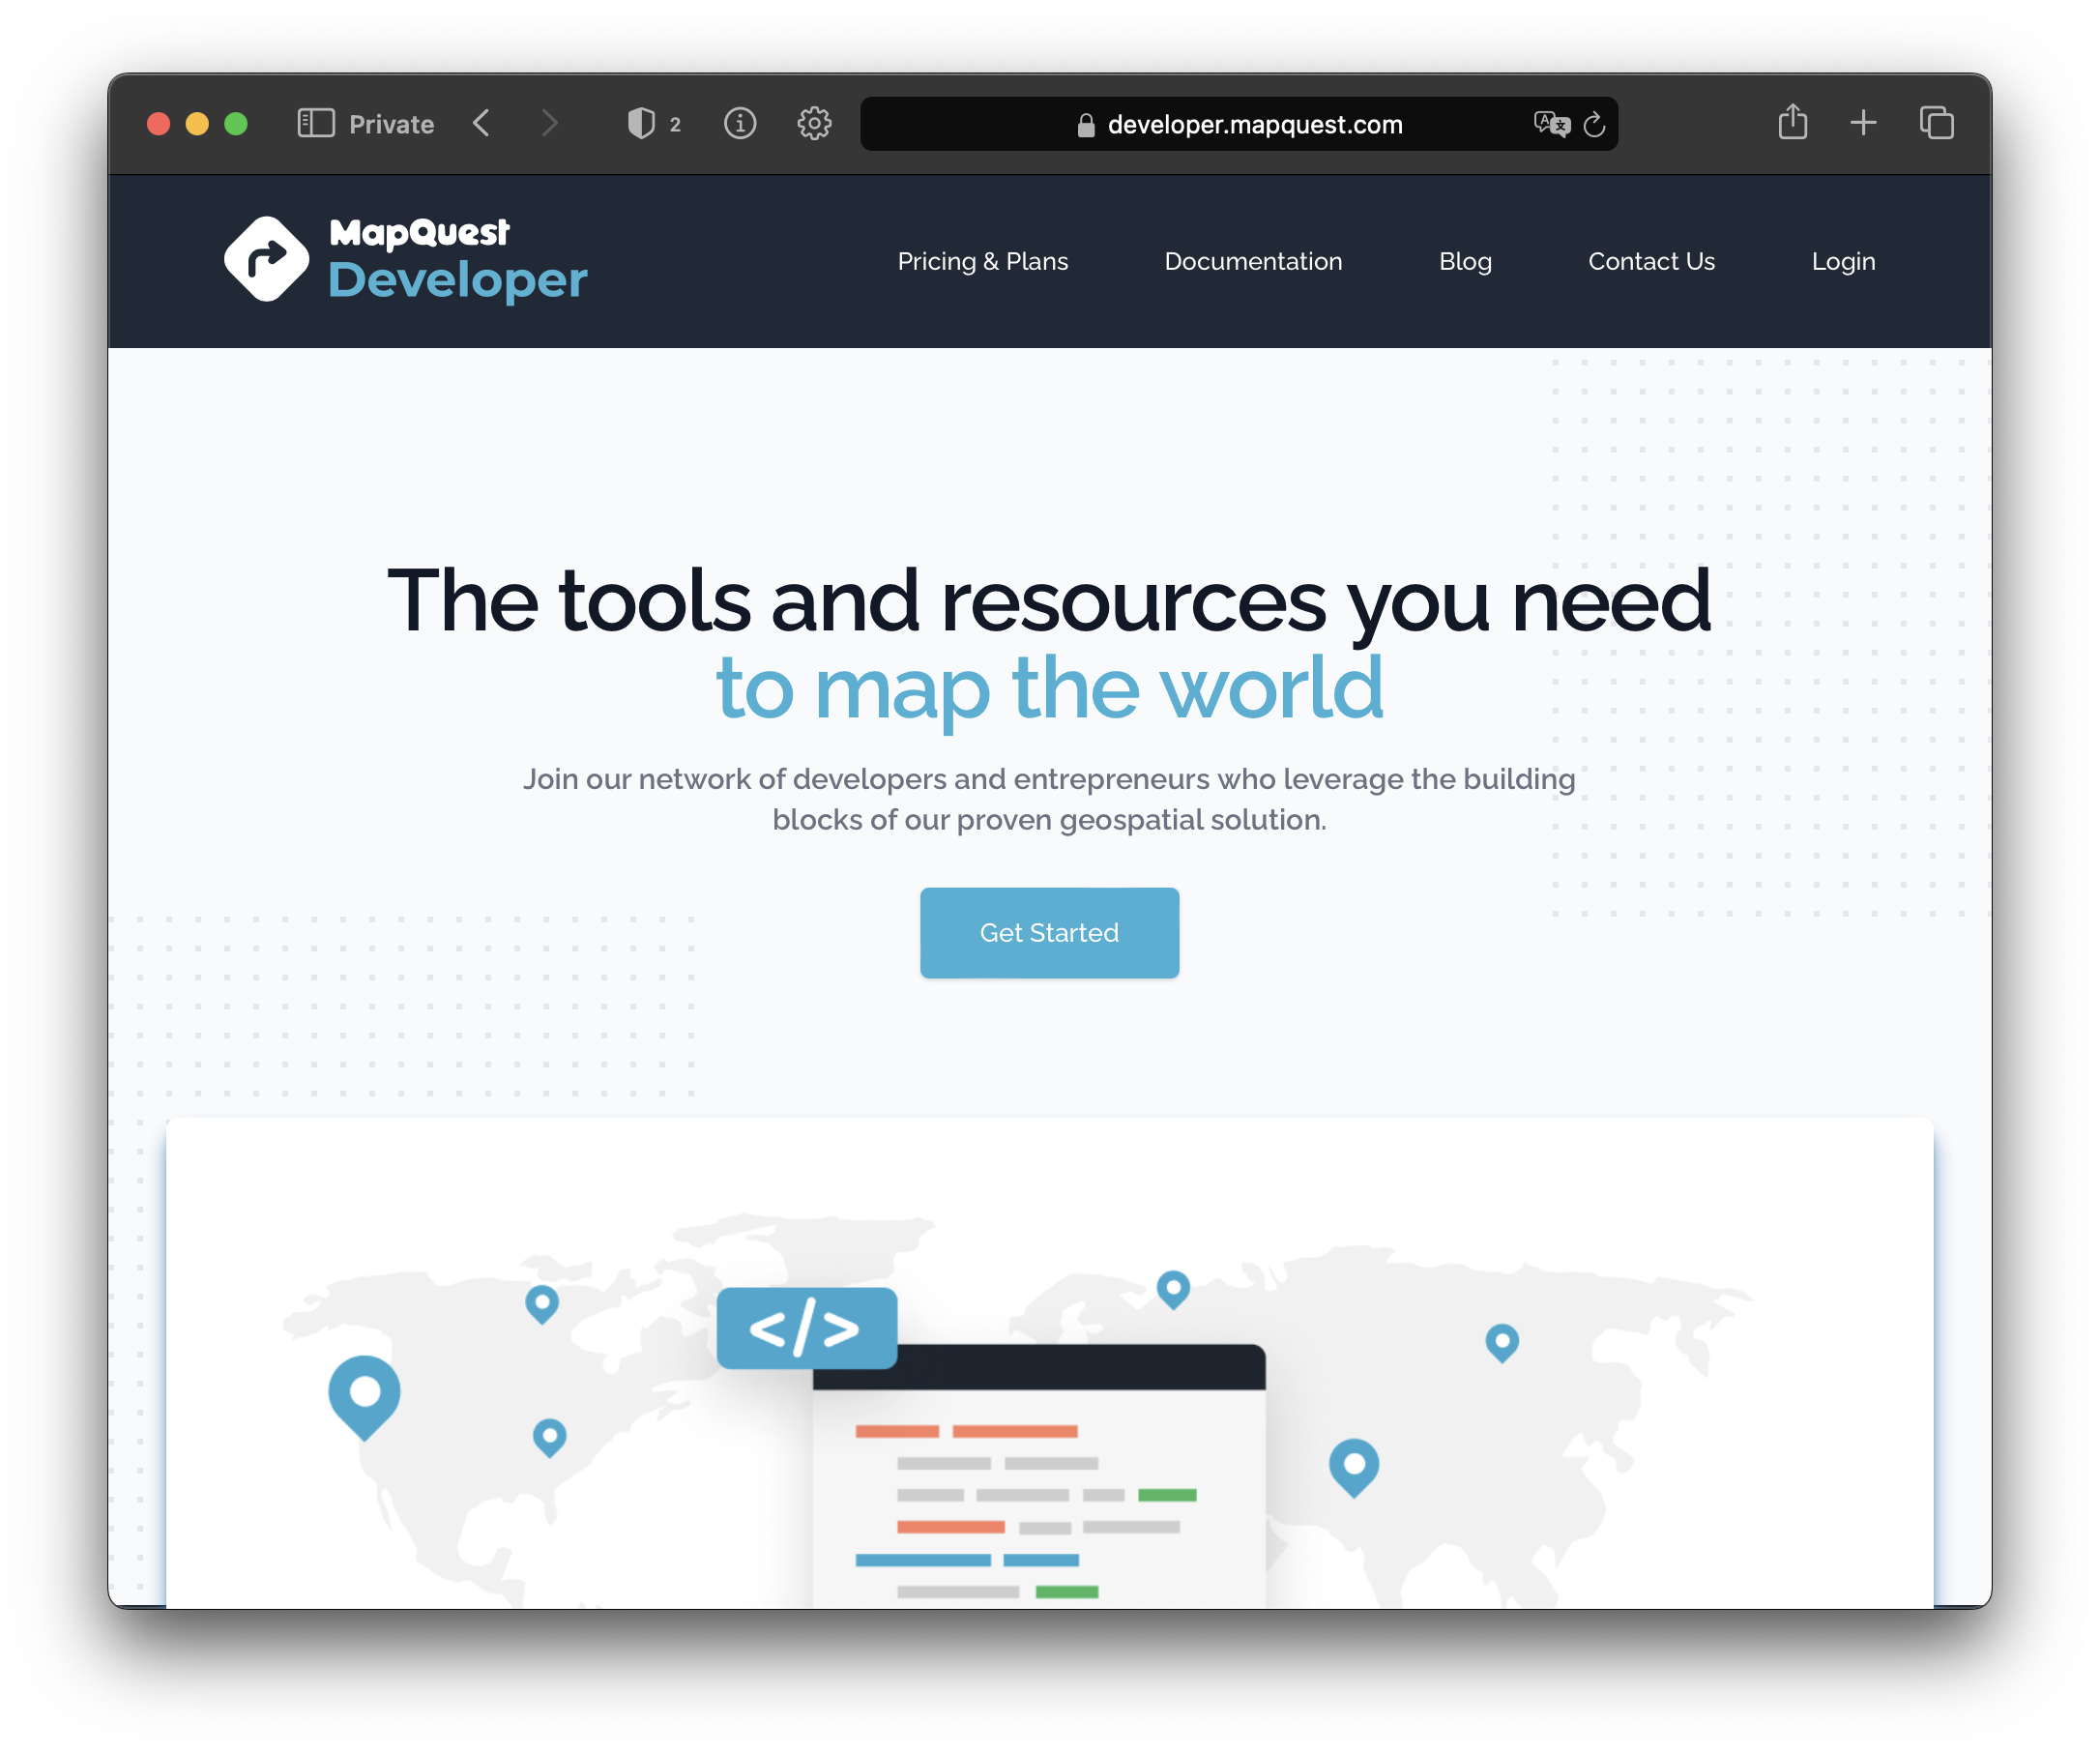
In your browser, go to https://developer.mapquest.com. Click the "Get Started" button.
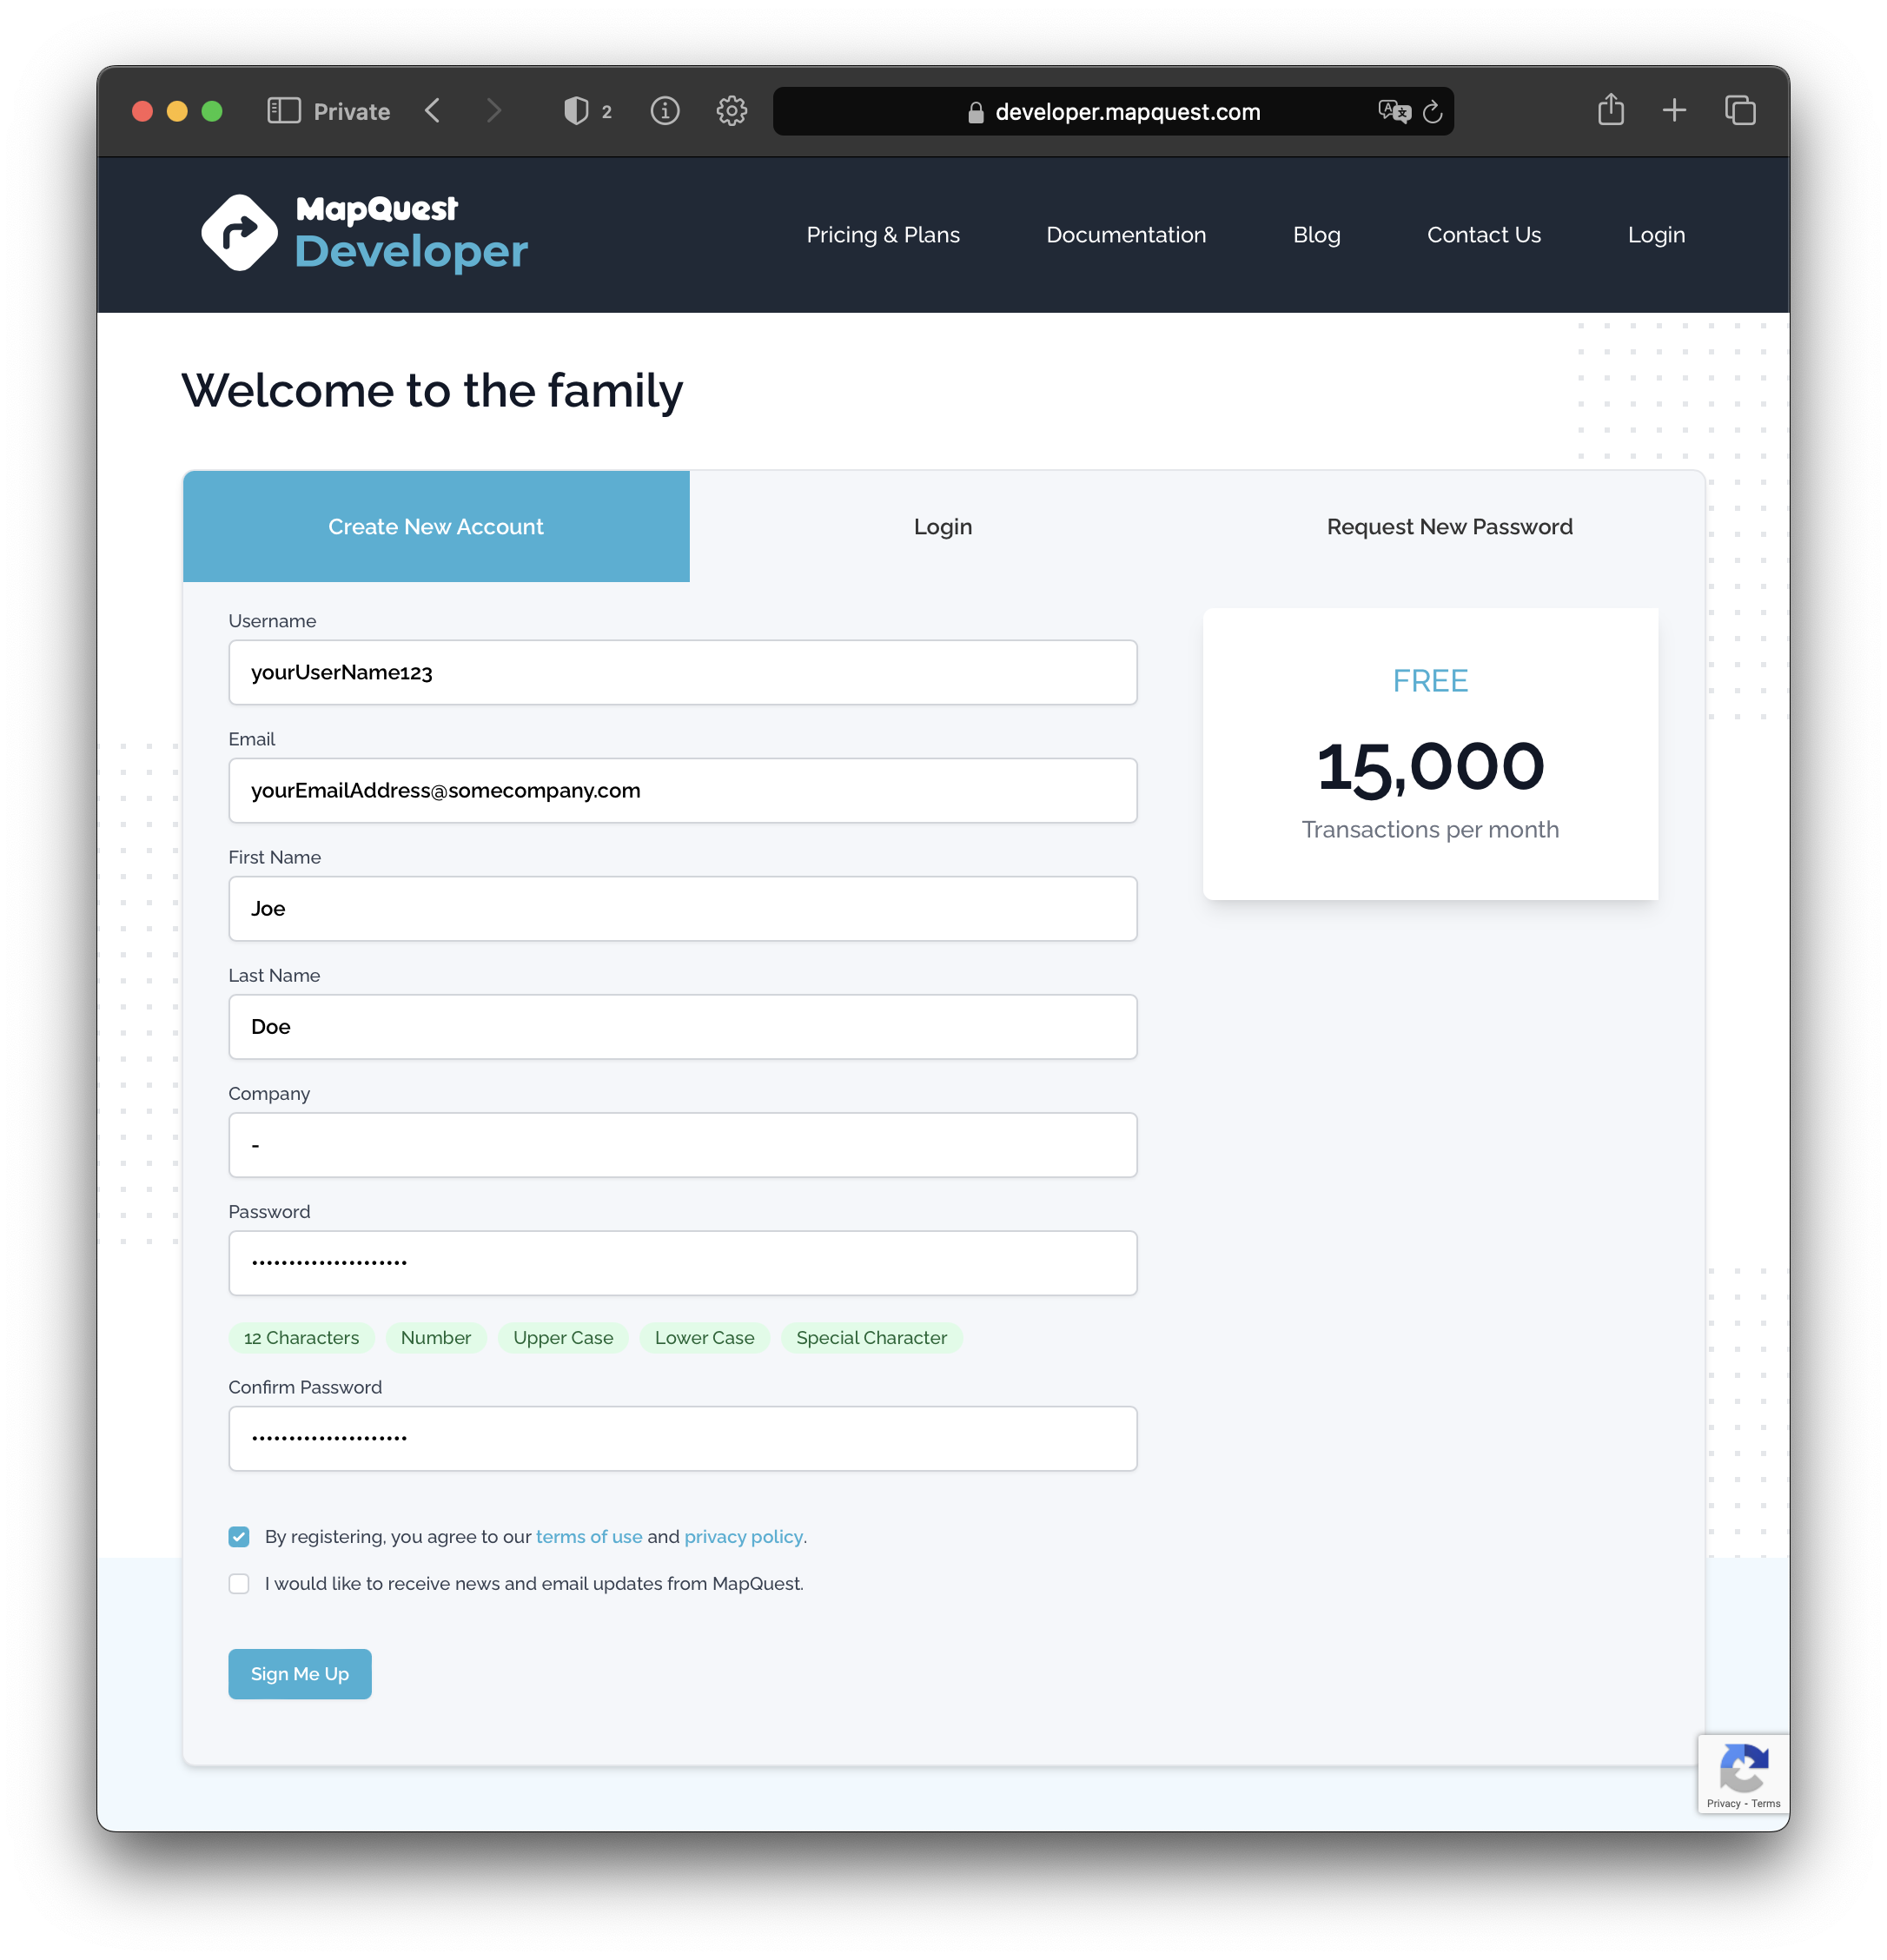
On the "Create New Account" tab, enter your information, i.e. a unique username, your email address (you will receive an email with a verification code, so use one of your actual email addresses!), a first and last name, and a secure password which you have to repeat. Click "By registering, you agree to the terms and conditions", then press "Sign me up".
After a short moment, the following popup should show up:
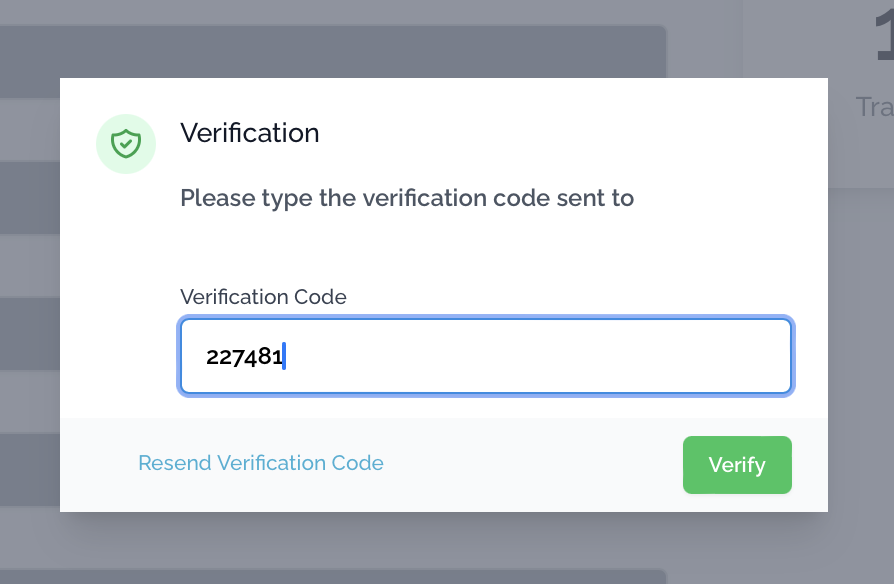
Within a few moments, you should receive the requested six-digit verification code via an email from no_reply@mapquest.com in the inbox of the email address that you used during registration on the screen before. Copy&paste this verification code into the input field in the popup (or type it in) and press the green "Verify" button. If you haven't made any mistakes and MapQuest performs well, you should then get to your newly created account information.
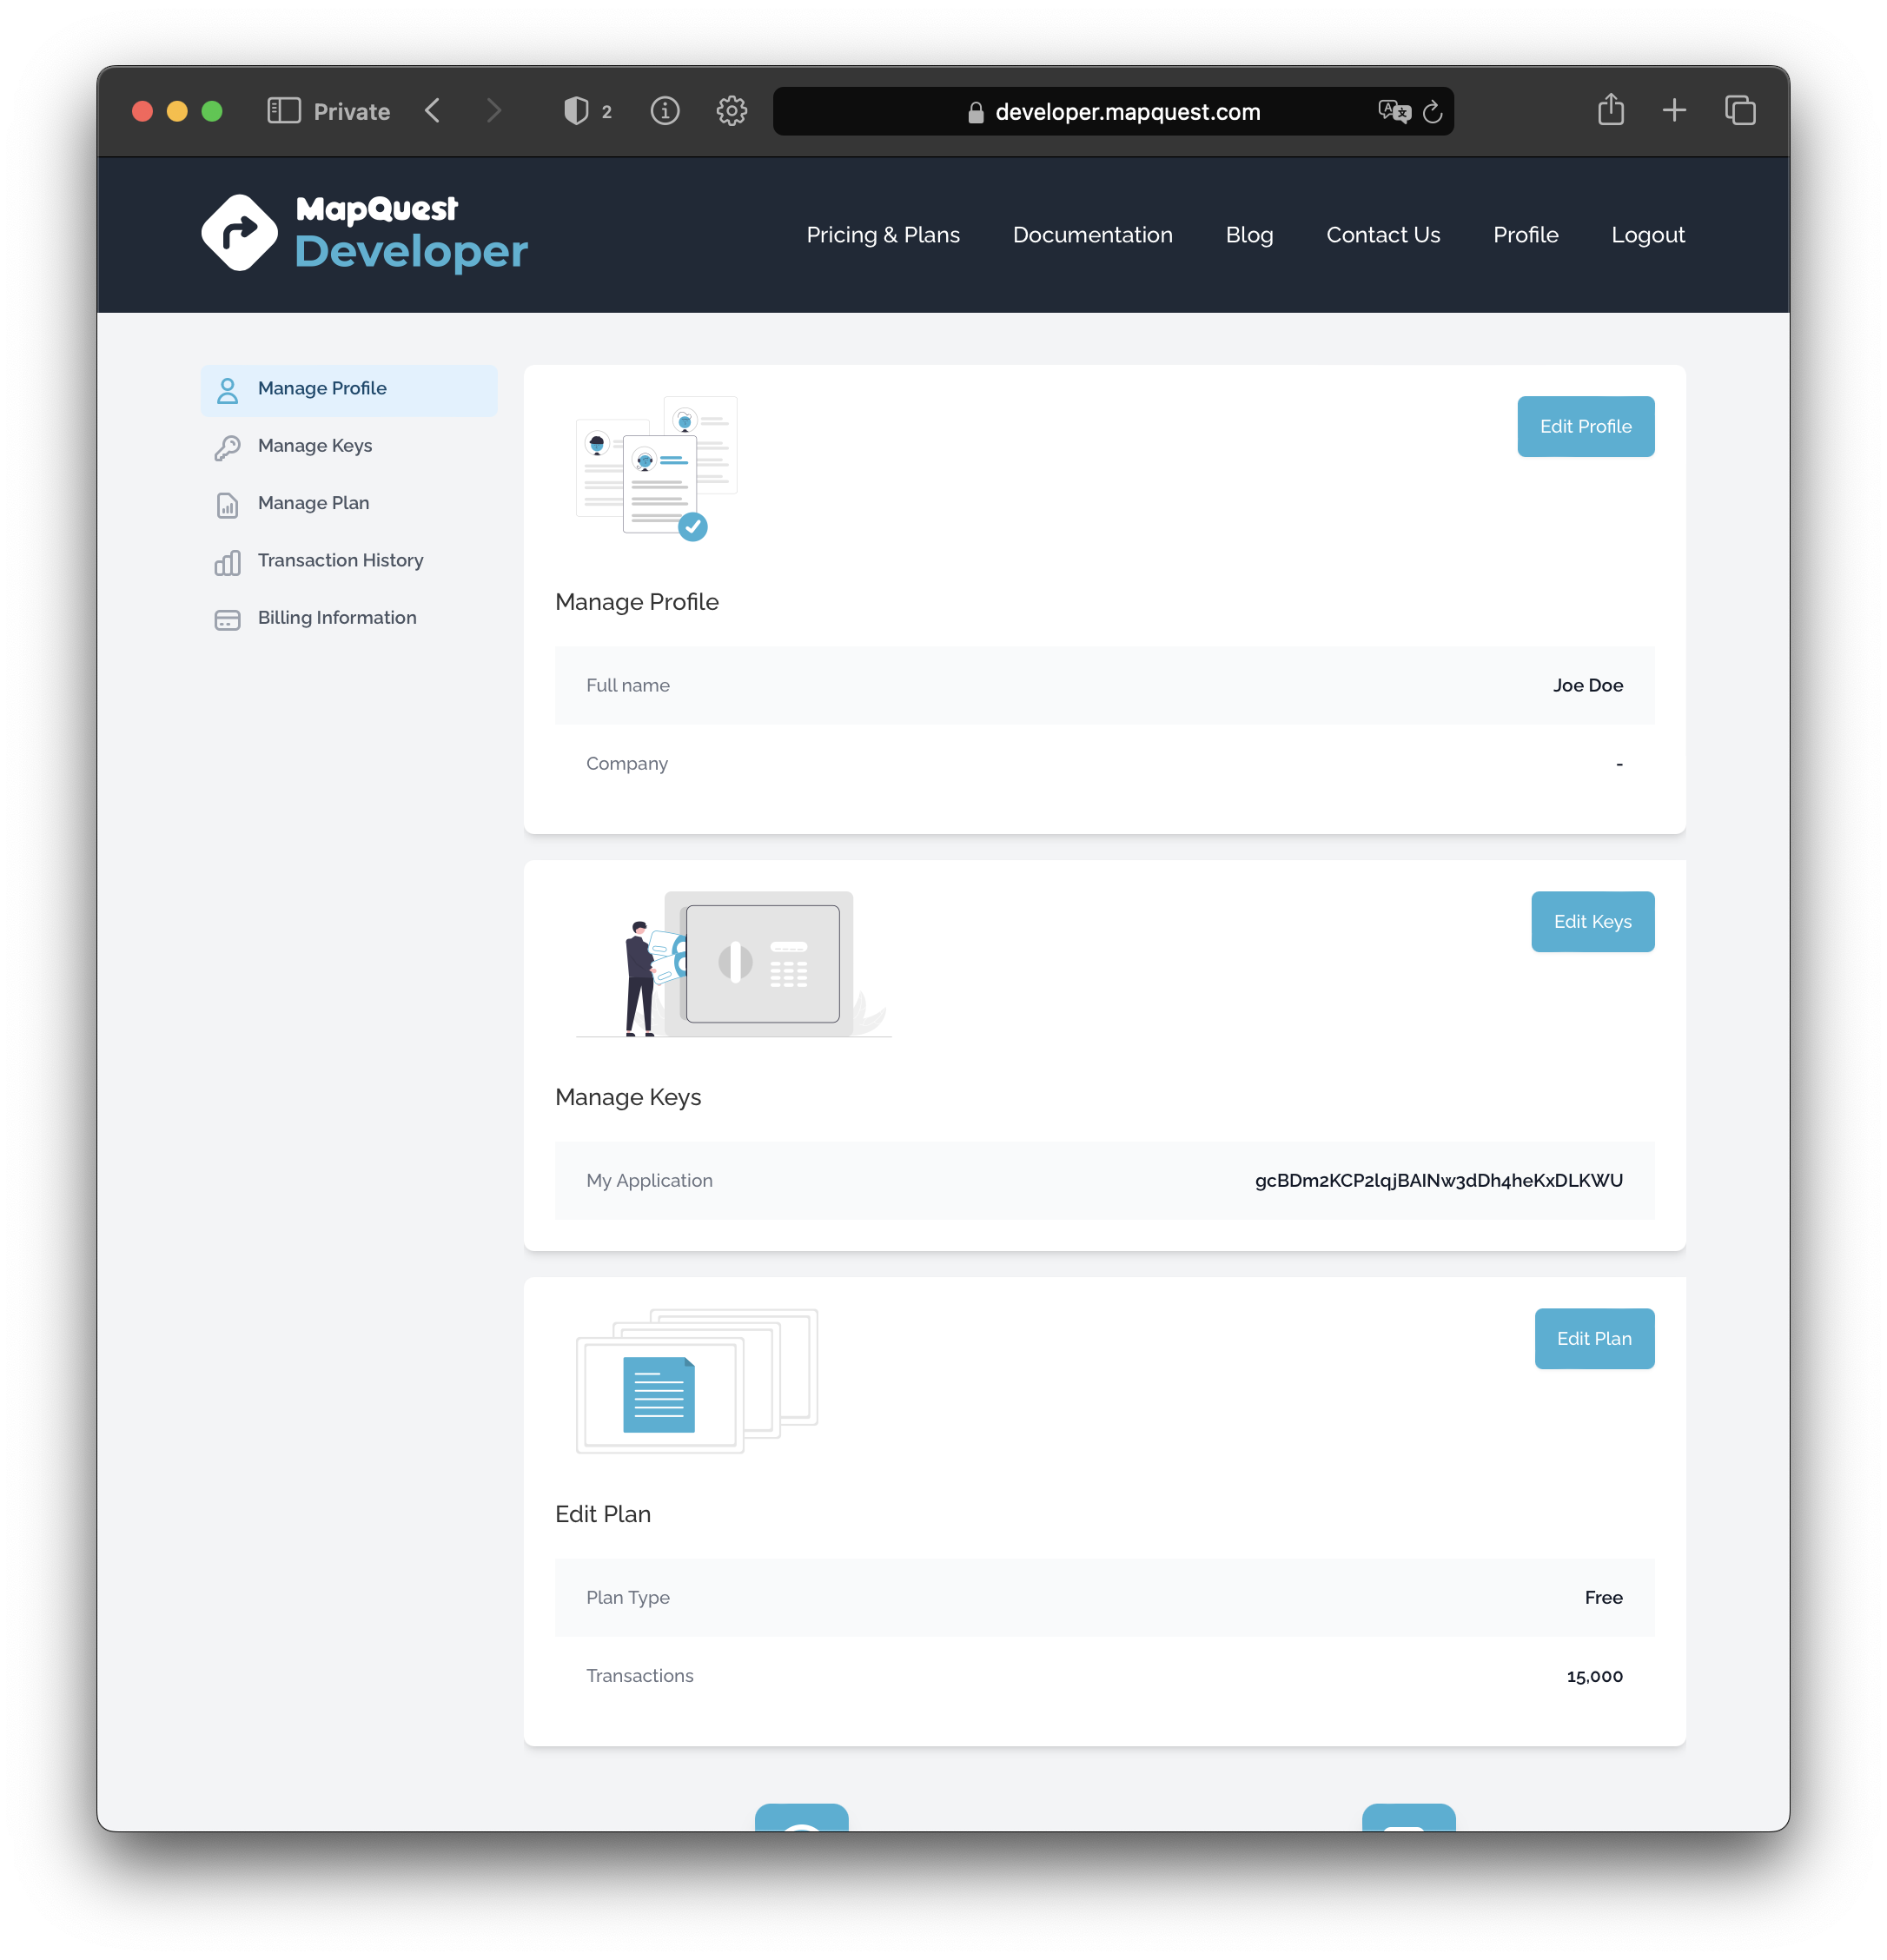
On the above page, click the blue button "Create Key" shown on the "Manage Keys" section. You will get to a page that shows one key with the name "My application".
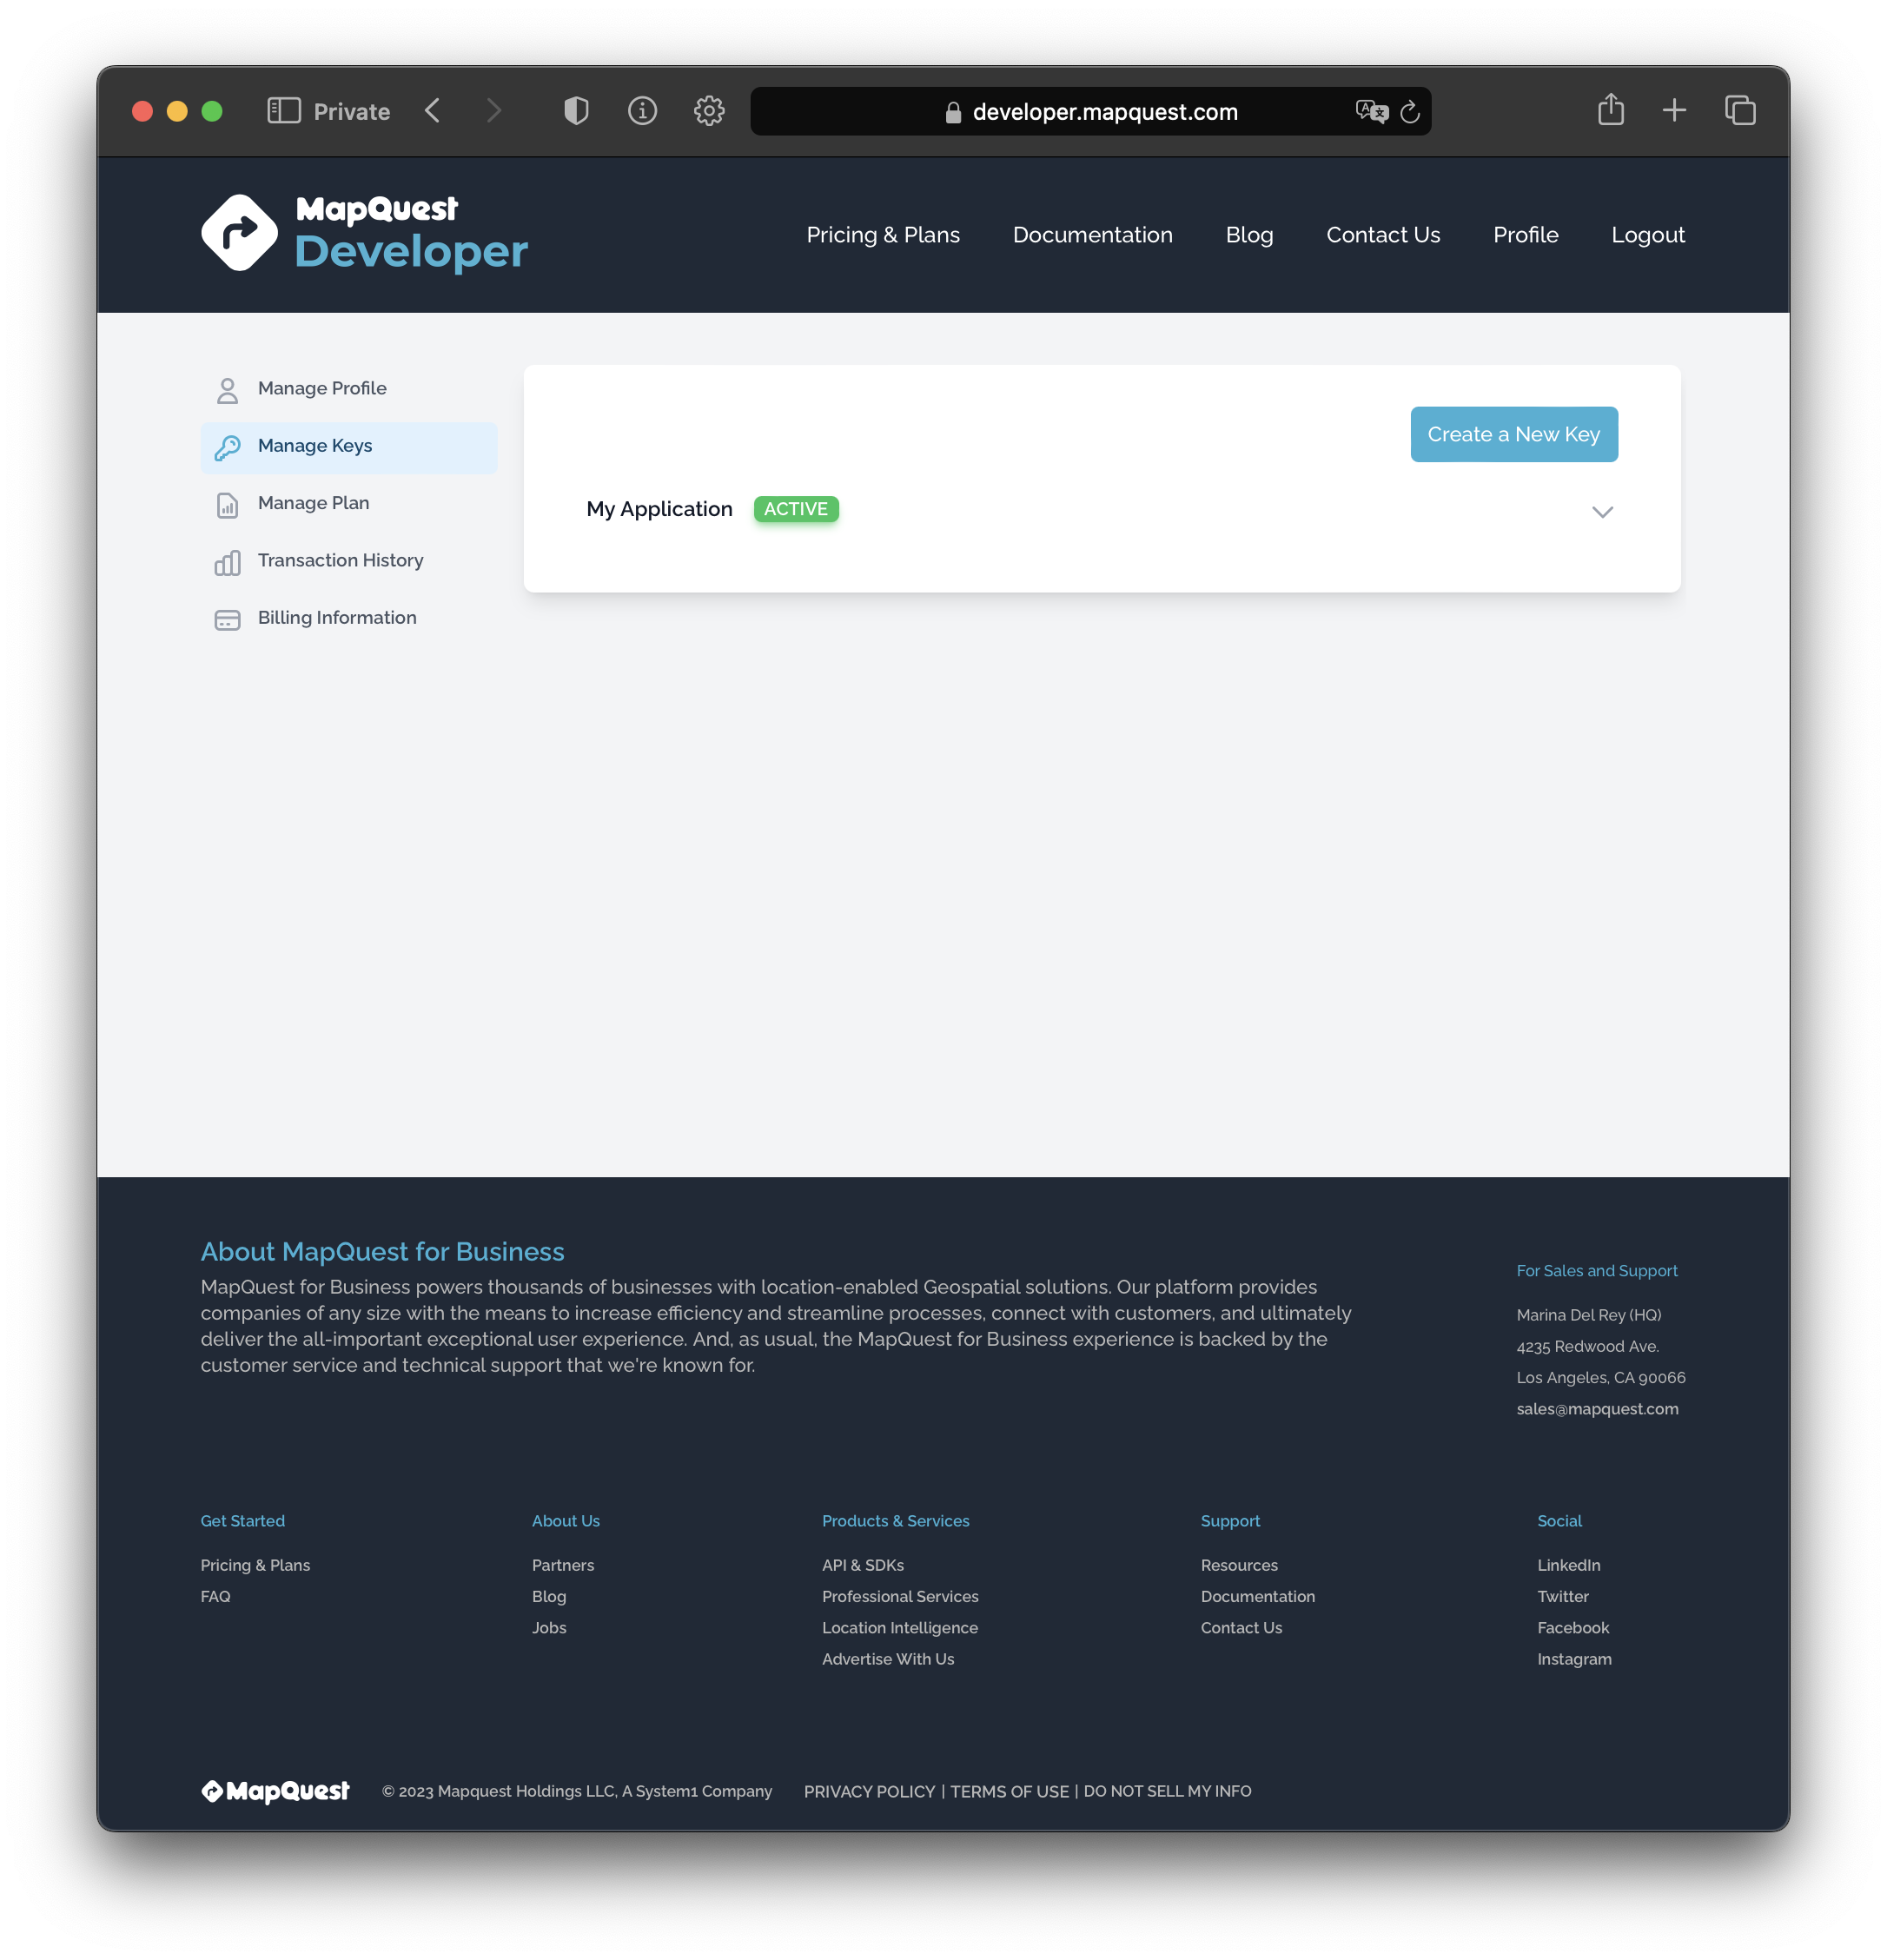
Since we want to have a decidated own API key for Photo Naminator, press the blue "Create A New Key" button in the upper right corner of the page. Yet another popup will show up with two text fields.
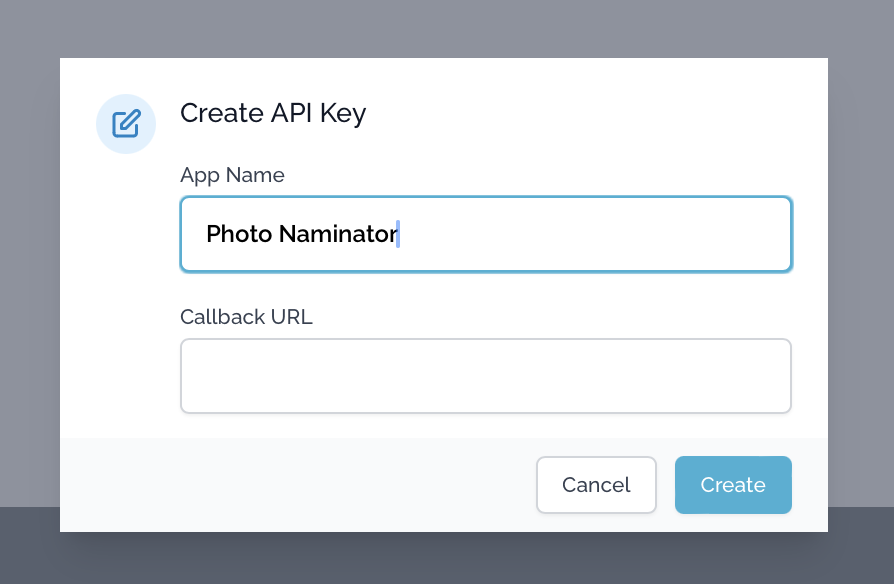
Type "Photo Naminator" into the upper one of the two text fields (labeled "App Name"). You can leave the second text field (labeled "Callback URL" empty. Then press the blue "Create" button.
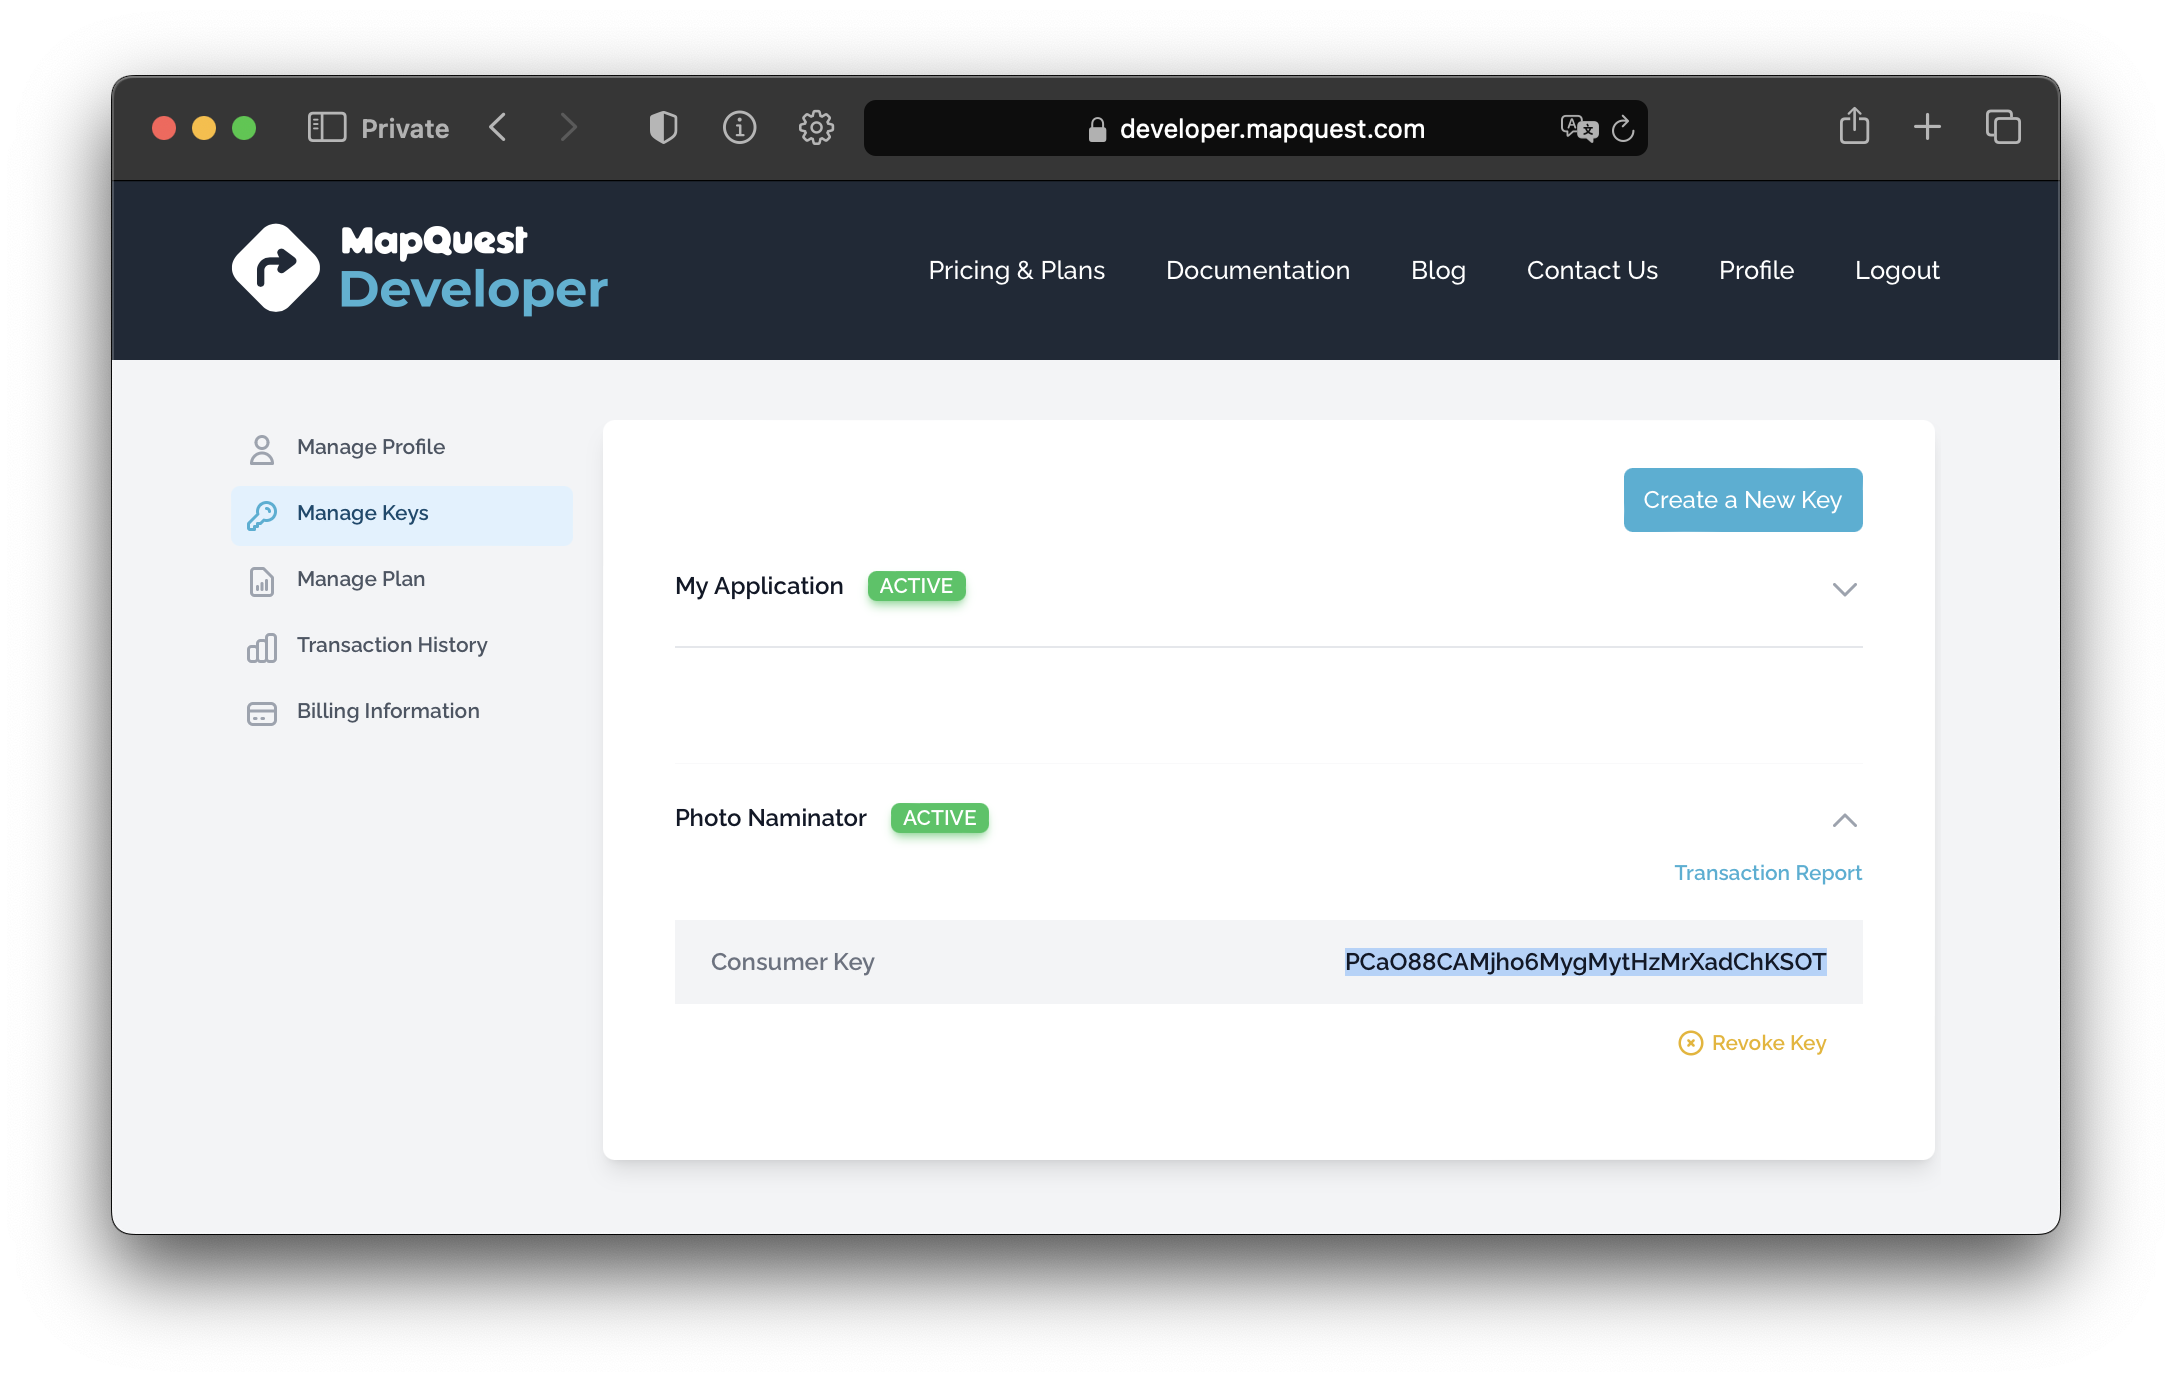
You will get back to a page showing all existing keys. Look for your "Photo Naminator" key and press the little grey chevron icon to the right of the key's name. This will open a hidden section that shows the label "Consumer key" and a long, quite cryptic character sequence to the right of it. This is our API key we are after!
Pressing "Transaction History" will show how many API calls (also referred to as "transactions") you have executed against an API with this consumer key. Your plan right now is a free-of-charge plan, which gives you 15.000 transactions/month for free. If you use up all those transactions prior to the next months, the API will stop working when it received requests. You can then either try to create a new account (using a different account name and email address – not really what this free plan is intended to encourage), or you purchase a paid for subscription giving you additional transactions against a monthly fee (not a bargain, quite frankly), or you wait for the next month to start so that your free plan gets "reloaded" with 15.000 calls again.
Now copy&paste the cryptic "Consumer key" to the clipboard (command-C key). Make sure you have copied all characters and not accidentially cut a few off when selecting! Only an exact copy will work when pasted into Photo Naminator.
All that is now left to do is switching to Photo Naminator, selecting the Settings section from the navigation bar, and enabling the reverse geolocating feature by clicking the respective option. This will enable the API key text field for entry and you can paste (command-V key) the API key copied from MapQuest. Please double-check that the pasted key matches the MapQuest consumer key exactly – this will save us a lot of headache and time.
More details and explanations about the reverse geolocating configuration in Photo Naminator can be found in the Settings section of this documentation.