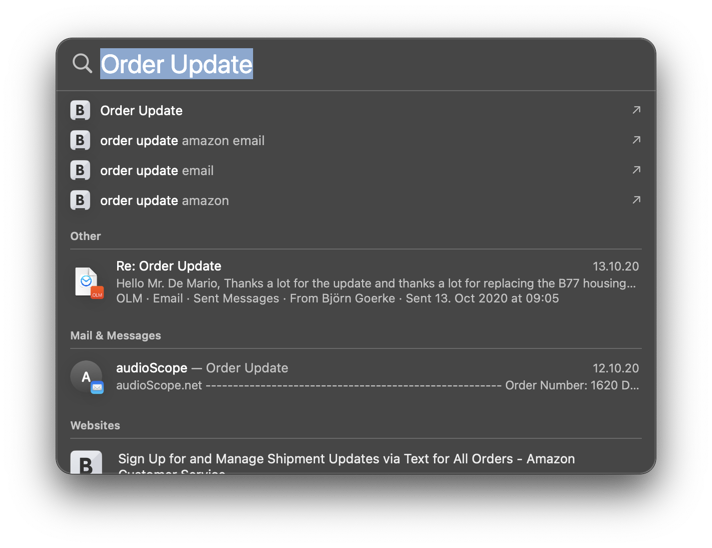
The .olm archive Viewer offers functionality to search specific items in an .olm archive since Olminator v2.60. Starting with v3.71 the 'ad-hoc' search functionality provided before has been replaced by full integration into your Mac's Spotlight search, thus providing much broader and powerful search capabilities. You can search for individual email, calendar, contacts or notes items in your .olm archives based on certain search terms. This can be done either in the Mac's system Spotlight dialog – press Command (⌘) + Space keys together to bring it up – or in a specific Find bar with within Olminator itself.
In contrast to the previously provided search functionality which worked 'ad-hoc' but at the cost of performance and limited capabilities, the Spotlight based search feature now requires an OLM archive to explicitely be indexes for searching. This gives you control over which .olm archives you may consider for indexing and searching because you will keep them as archives to evenutally look up information – then indexing may make sense – or whether they are transient in nature and will be deleted after you have converted their content into alternative formats.
Before you can start using Spotlight search to find items in an .olm archive, the archive must be indexed within Olminator. This feels and behaves like a conversion applied to an archive – so it will be reasonably fast and unspectacular, and it the progress will be shown with the usual progress indication. Unless you explicitely index an archive, it will not be searchable – neither within nor outside of Olminator – through Spotlight.
If you are in Olminator's Viewer section and open the Find bar as described above, Olminator will automatically check if the currently selected .olm archive has been partially or completely indexed already. If so, the Find bar will come up in all its glory. If you haven't indexed the archive yet, you will be prompted accordingly and the press of the corresponding button will start the indexing.
Alternatively, you can use the conversion type menu and Start button at the bottom of the Viewer section to manually trigger the indexing of the archive.
To stop the indexing of an archive while it is still in progress because you have changed your mind, you can always press the Stop button at the bottom of the Viewer section. The progress in indexing the archive will be shown with the usual progress indicator known from the various conversions available thru Olminator.

As mentioned above, after having indexed an .olm archive, you can search its content – emails, contacts, calendar events or notes – like you search any other items on your Mac through Spotlight. Press the Command (⌘) + Space keys together to bring the dialog up. You can then search matching content to your liking and following the usual query mechanics of Spotlight. Please refer to available documentation and tutorials on the Internet how to do so.
Items accessible through Olminator in a corresponding .olm archive will be marked with a small Olminator icon in the lower right corner of the item's icon in the result list. Clicking on it will open Olminator, bring up the Viewer section and navigate you directly to the corresponding item.
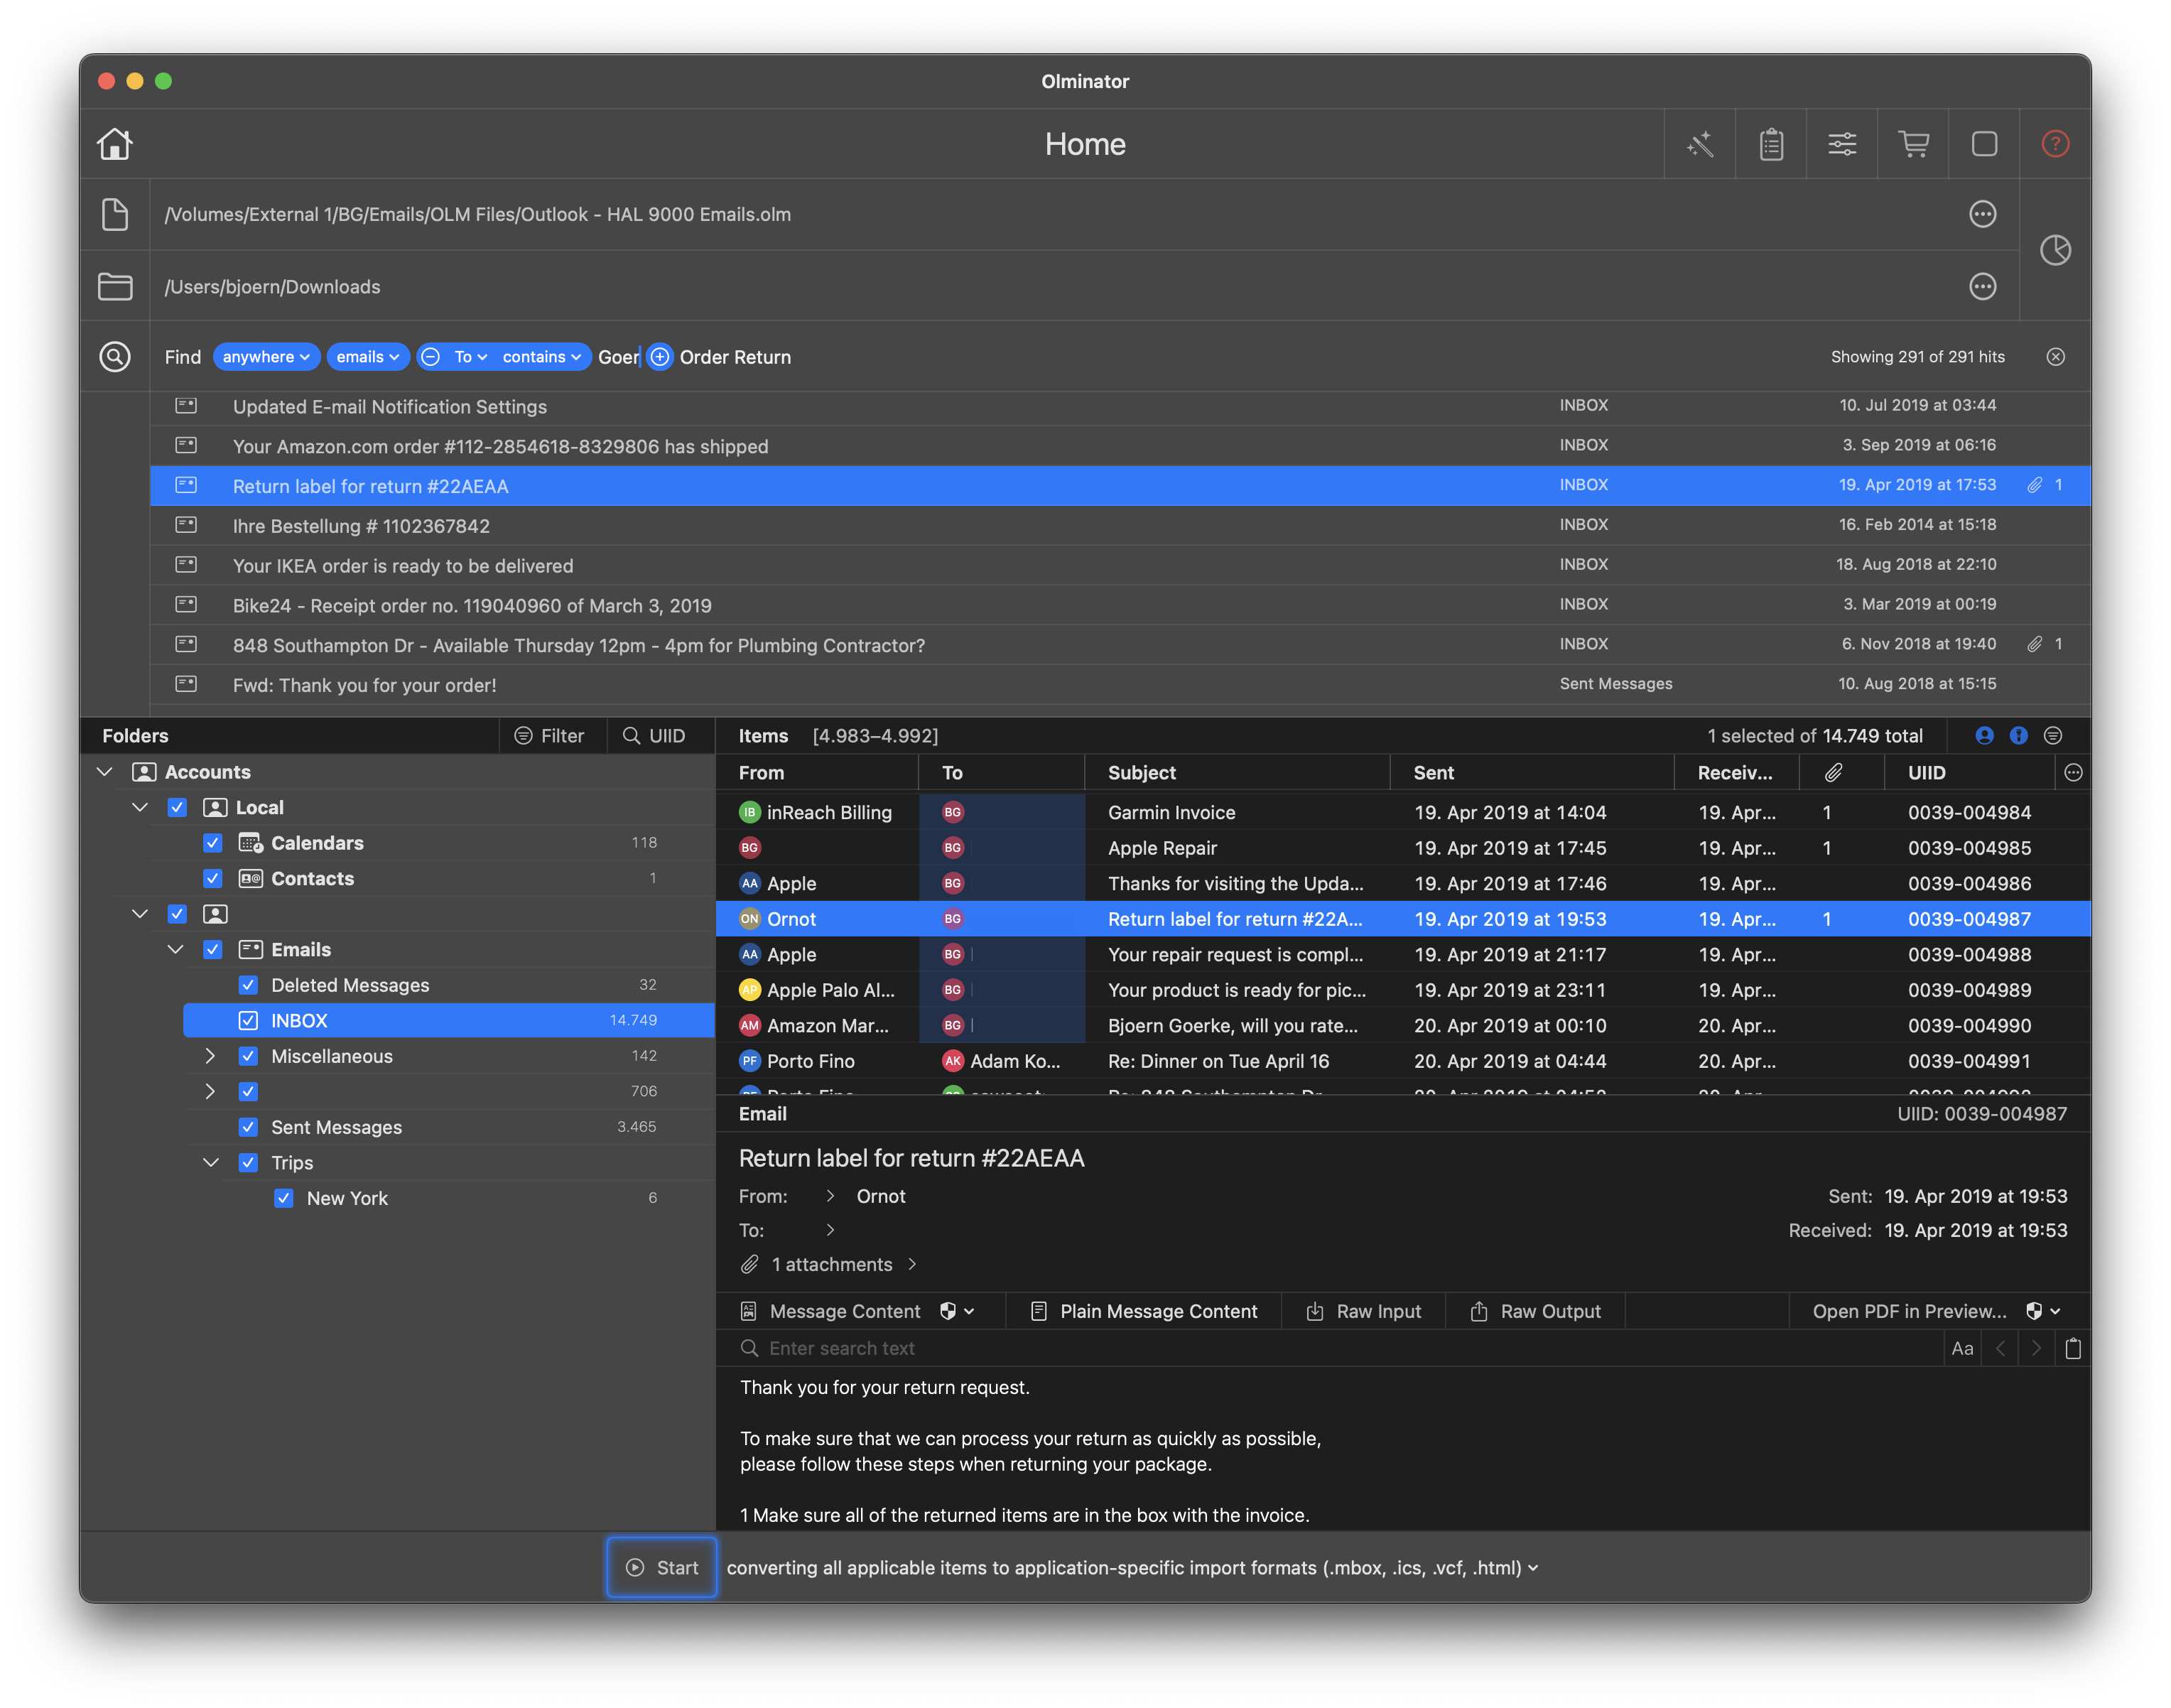
Alternative to the system Spotlight dialog, Olminator comes with an integrated Find bar in the Viewer section. Here you can directly search an archive within Olminator and provide more specific constraints for the search in a convenient fashion.
To bring up the Find bar, proceed as follows: In the upper left corner of the Viewer tab, to the right of the Folder header, you'll recognize a little magnifying glass icon. Clicking this icon will open the Find bar which will be placed above the Viewer's folder and table view.

By clicking the magnifying glass icon on the left of the Find bar, you can close the Find bar again.
The Find bar provides you with a free-text search token field in which each word you type will be used as a single search token that an item's content or attributes (like 'received' date, or subject line, etc.) must prefix-match to be considered a valid search result. For example, the free-text search entry 'Outgoing call' will search for an item that contains both a word starting with 'outgoing' and a word starting with 'call' in at least one place of its content or attribute values. Spotlight will automatically assign some relevant of the search results based on level of fit to your search query. The search result items will be displayed in the order as returned by Spotlight.
In addition to the free-text search token field, the Find Bar allows you to narrow down the search scope in the following ways:
In general: All search criteria specified are to be fulfilled jointly (logical AND semantics) for an individual item to match.

Once you have specific some search criteria, Olminator will inquire with Spotlight which items in the respective archive are matching and will display (by default) a maximum of 500 top search results. Should you need to go beyond 500, you can request more at any time when scrolling down the result list. In general, it is probably more advisable to make search criteria more specific to narrow down the result set.
When hovering the mouse over the search results, additional infos will be shown per item to help you quickly scan the results for relevance. When clicking an item, it will be automatically selected in the folder view to the left of the Viwer, the items displayed in the table and the detail view of the item itself.
In general, any search term you use either in the free-text search token field or in the item specific search attributes will be considered as a word prefix to match (i.e. 'cat' matches 'cat' or 'catalog', but not 'concatenate') in a case-insensitive manner (i.e. 'E' is equivalent to 'e') and with diacritical marks being ignored (i.e. 'é' is equivalent to 'e').
While the search term of individual attributes is considered as one word, the free-text search token field considers every word given and separated by one or more space characters as individual word to be pre-fixed matched. As an example, typing the two words Walt Whitman will result in 'Walt' being prefix matched AND 'Whitman' being prefix matched. If you want Walt Whitman in this exact sequence being matched (i.e. Walter Whitman will not be matched!), you need to place single quotes (') around the two words in the free-text field, i.e. 'Walt Whitman'.
If you want to not only prefix match a search term, but want the search term to be matched anywhere in a word or character sequence, preceed it with an asterix (*) character. For example, *cat will not only match 'cat' and 'catalog', but also 'concatenate'.
Numerical attributes as well as dates can be compared against being smaller/earlier or larger/later than a reference value specified.
Date attributes can be compared against points in time that must be specified in ISO8601 compliant fashion to be properly matched. As an example: '2025-01-14' (i.e. YYYY-MM-DD) or '2025-01-14 13:01:59 +0001' (YYYY-MM-DD HH:mm:ss ZZZ) constitute valid search terms. By adding two search criteria for the same attribute (e.g start date of an appointment) and comparing one value against being later and the other search term being earlier, you can narrow down the search to match a specific time window.
The search index created for an .olm archive will exist for roughly 1 year by default. You can configure 3 months or forever as an alternative in Olminator's Settings section. There you can see the expiry dates for each archive indexed, or manually remove an index earlier than it automatically expires.
Hint: Spotlight always requires a retainment period for indexed items. It may decide to drop search items from the index after that period to keep search content relevant. Olminator gives you some control over this retainment period.
In its current implementation, Olminator's Spotlight integration still comes with the following limitations that are planned to be addressed in an upcoming update:
Thanks for your understanding!
Please see the respective paragraphs in the documentation about configuration options, which can be found on the Configuring Olminator page. The most straightforward defaults have been chosen to guarantee a smooth usage "out of the box".